 Shoopy
 Product fields, variants and size charts
Turn on built-in fields, add custom Variant, Attribute, Checkout, and Size Chart fields, and control how each appears on your storefront.
Product fields are the building blocks of every product card in your store. Some are built into Shoopy (Brand, Barcode, HSN, Shipping Weight) and you simply switch them on. You can also create your own — a Variant axis like Size, an Attribute like Material, a Checkout Field that asks shoppers for input at the cart, or a Size Chart for clothing. Together they cover everything from spec sheets to personalised orders.
For the catalogue basics, see Adding a product in Shoopy and Shoopy product variants. Spec-heavy catalogues lean on these fields most — see electronics retail.
Before you begin
- Sign in at
web.shoopy.in. For details, see Logging in with OTP. - Your role must allow catalogue edits. Owner, Admin, and Catalog Manager can manage product fields.
- The Checkout Field type needs the Business plan. The other custom types — Variant, Attribute, and Size Chart — are available on every plan.
- Plan field changes carefully. An existing product that uses a Variant Field keeps its values even if you later edit the field’s options.
Opening the Product Fields panel
Product fields live behind a single panel. To open it:
- In the left sidebar, click Catalog to expand it, then click Products. The Products list opens.
- At the top right of the page, click the Settings icon. The Product Fields panel slides in from the right.
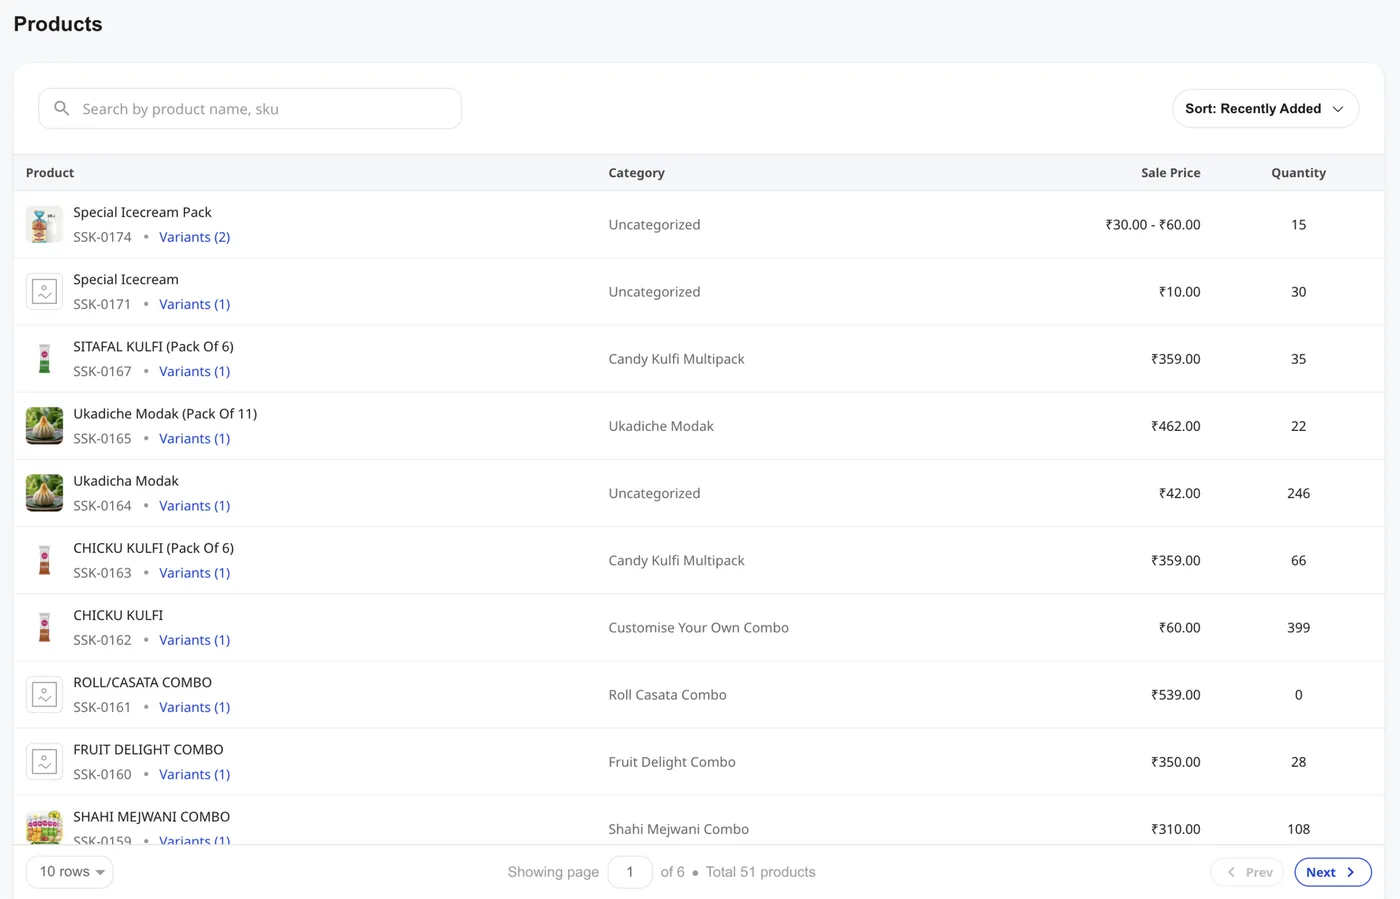
Every action in this article starts from this panel.
Built-in product fields
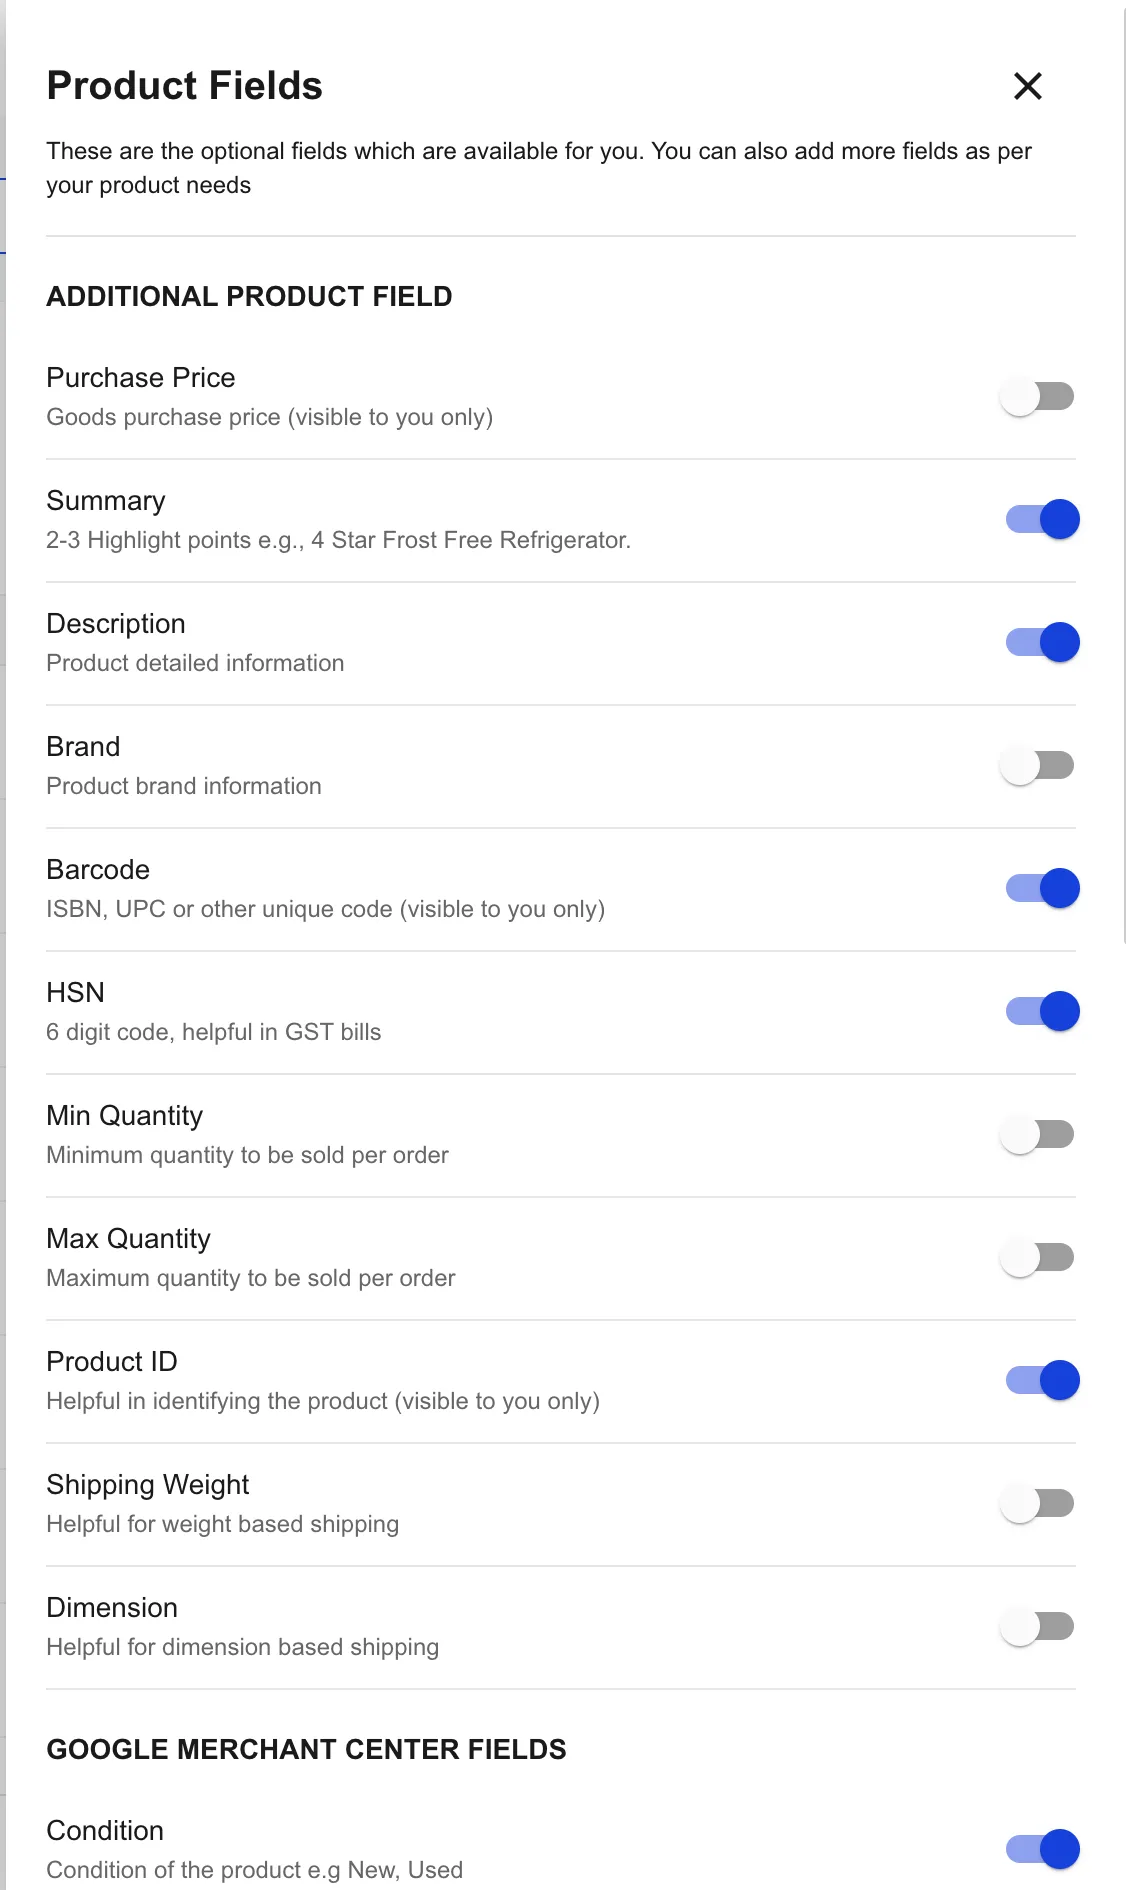
The first section of the panel — labelled Additional Product Field — lists the optional fields Shoopy ships with. Each one has a toggle. Switch on only what your catalogue needs and keep the product form short.
- Purchase Price — your buying cost (visible to you only).
- Summary — 2–3 highlight points, e.g. “4 Star Frost Free Refrigerator”.
- Description — long-form product detail.
- Brand — product brand information.
- Barcode — ISBN, UPC, or other unique code (visible to you only).
- HSN — 6-digit code, helpful in tax bills where applicable.
- Min Quantity and Max Quantity — minimum and maximum units a shopper can buy in one order.
- Product ID — your internal SKU or part number (visible to you only).
- Shipping Weight — weight used by weight-based shipping rules.
- Dimension — length × width × height for dimension-based shipping.
If you have the Google Merchant Center app installed, a Google Merchant Center Fields section appears below with extras like Condition (New, Used). Those fields sync to the GMC feed when you push the catalogue.
The four custom field types
Below the built-in toggles, the panel ends with Add New Field. Click it to open the Add Field form. The first dropdown — Product Field Type — lets you pick one of four kinds:
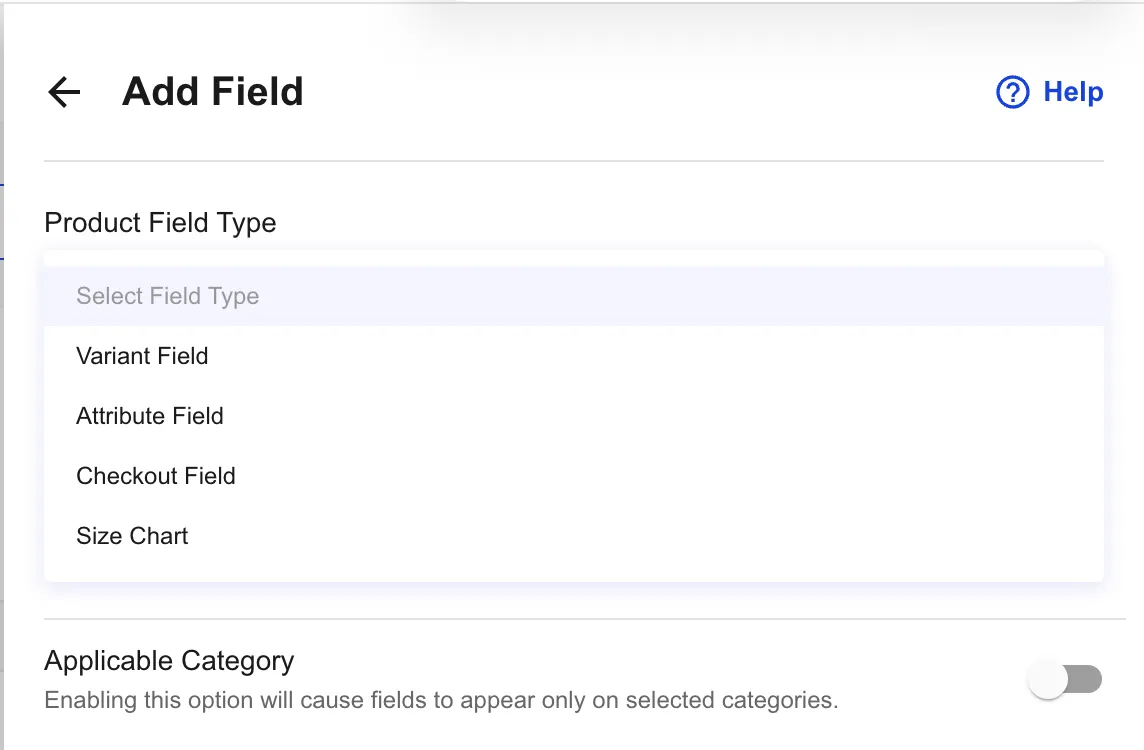
- Variant Field — a product axis like Size or Color. Pick this when one product comes in multiple SKUs.
- Attribute Field — a product spec like Material, Capacity, or Care Instructions. Attributes appear on the product detail page and (optionally) as filters on the storefront.
- Checkout Field — a question you ask the shopper before they pay. Business plan only.
- Size Chart — an HTML block that renders as a sizing table on the product page.
Pick the one that matches what you are trying to capture, then fill in the rest of the form.
Adding a custom field
Whichever type you pick, the form starts the same way:
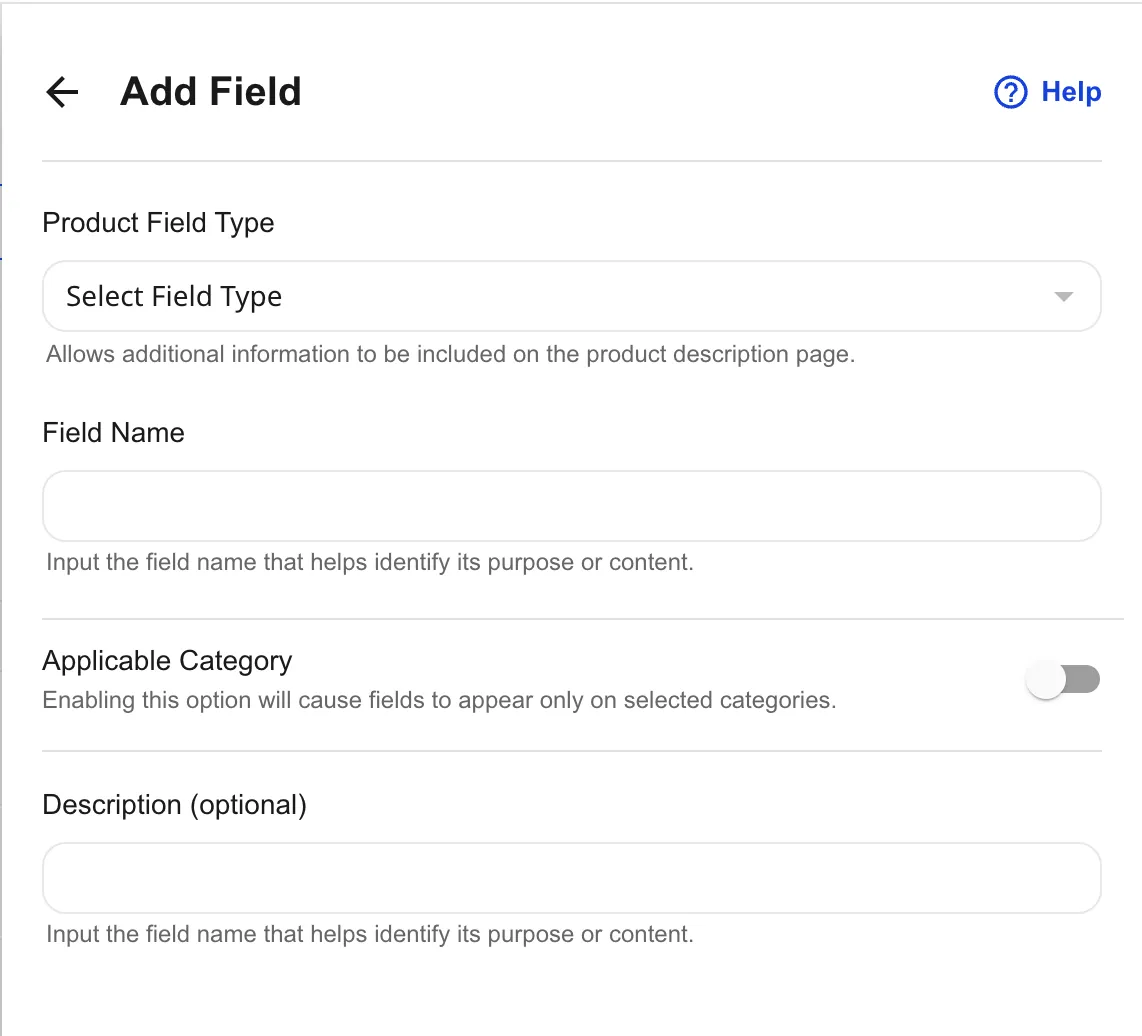
- Click Add New Field at the bottom of the Product Fields panel.
- Choose a Product Field Type from the dropdown.
- Enter a Field Name. This is the label shoppers (or you) see — for example,
Material,Engraving, orCup Size. - (Optional) Toggle Applicable Category on if the field should appear only for products in specific categories, then pick the categories.
- (Optional) Add a Description to explain what the field is for, so future-you and your team understand the intent.
- Fill in any type-specific options (covered below).
- Click Save. The field appears in the matching section of the Product Fields panel — Product Variant Fields, Product Attribute Fields, Product Checkout Fields, or Product Size Chart Fields.
For details on assigning the field’s value to each product, see Adding a product in Shoopy.
Variant Fields
A Variant Field defines an axis on which one product splits into multiple SKUs. Size, Color, Pack Size, and Flavour are common variant axes. Two variant fields together — Size × Color — create a grid of SKUs.
Pick a Field Data Type for the variant:
- Text — a free-form short string (e.g.
Small,Medium,Largetyped per product). - List — a fixed dropdown of values you define once. Every product that uses this field picks from the same list. Tip: name the field
Color(lowercase) and the form adds a colour picker so you can store hex codes alongside the label.
Toggle Do not show in Products Filter Menu off to expose this Variant Field as a filter chip on the storefront category and search pages, so shoppers can narrow by Size or Color from the listing without opening every product.
For the variant workflow on individual products, see Shoopy product variants.
Attribute Fields
An Attribute Field records a spec — Material, Capacity, Care Instructions, Warranty Period — without creating a new SKU. All variants of the same product share the attribute value.
Pick a Field Data Type:
- Text — a free-form value typed per product.
- List — a fixed dropdown so spelling stays consistent across the catalogue.
- HTML — a rich-text block for longer specs that need formatting.
The same Do not show in Products Filter Menu toggle controls whether this Attribute Field becomes a storefront filter. Attributes you want shoppers to filter by — Material, Brand — should keep the toggle off; back-office-only attributes should keep it on.
Checkout Fields (Business plan)
A Checkout Field asks the shopper for input before they buy. Use it for personalisation — engraving text, gift message, preferred delivery slot, photo upload.
Pick a Field Data Type:
- Text — a free-form short text input.
- HTML (Rich Text) — a longer formatted note.
- List — a dropdown of preset choices.
- Date or Date Time — a date picker, with optional minimum and maximum buffer periods.
- File — a file upload (logo, photo, document) the shopper attaches.
Toggle Make field mandatory on if the shopper must fill the field before checkout. You can also set the field to apply only to selected categories — handy when only certain products need the input.
Note: Up to 5 Checkout Fields are shown to the customer for any single product. Pick the most important ones if you have more.
Size Chart Fields
A Size Chart holds an HTML table — typically a sizing reference for clothing, footwear, or accessories. The chart appears on the product detail page where shoppers can see it before adding to cart.
Paste your sizing HTML into the editor — most merchants build the table once in a doc tool, copy the HTML, and paste it here. The same chart can be reused across every product in a category by toggling Applicable Category on and selecting the right categories.
How fields appear on the storefront
Different field types render in different places on the product page:
- Variant Fields show as selectable chips or swatches near the price. The shopper picks one chip per variant axis to choose the SKU.
- Attribute Fields appear in the product specs area below the description. Those marked filterable also become filter chips on the category page.
- Checkout Fields appear above the Add to Cart / Buy Now buttons, so the shopper sees and fills them inline as part of the buy flow.
- Size Chart appears as a table on the product detail page or behind a Size Chart link.
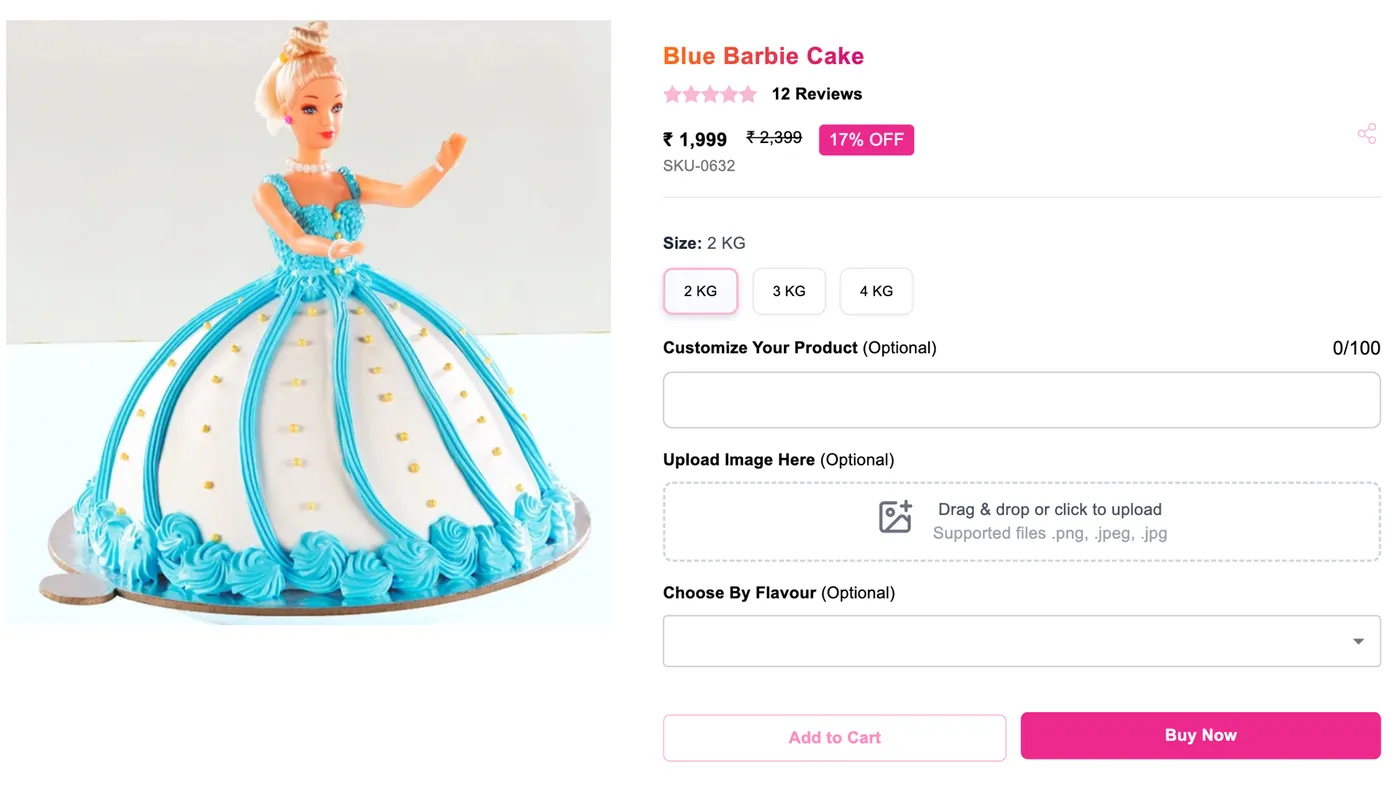
The screenshot below shows all of them on a single product. Size is a Variant Field (2 KG / 3 KG / 4 KG); Customize Your Product is a Text Checkout Field; Upload Image Here is a File Checkout Field; Choose By Flavour is a List Checkout Field.
Editing or deleting a field
Open the Product Fields panel. Each custom field row has an edit pencil and a trash icon.
- Edit — change the Field Name, options, mandatory flag, or applicable categories. Save to apply across the whole catalogue.
- Delete — remove the field. It is removed from the panel and from every product, and existing values for that field are cleared. Only delete a field once you are sure no product still relies on it.
Tips
- Switch on only the built-in fields you need. Toggling everything on bloats the product form. Start lean and add fields as the catalogue grows.
- Use List type wherever you can. Free-text values lead to typos like “cotten” vs “Cotton” and break filtering. Pick List for Material, Color, Size, and other repeating values.
- Keep Variant Fields to two axes. One axis (Size) is simple. Two axes (Size × Color) is the practical limit. Three axes create dozens of SKUs that confuse shoppers and inflate inventory.
- Mark non-filterable attributes with the toggle. Internal-only attributes — supplier code, shelf number — should keep Do not show in Products Filter Menu on, so the storefront filter list stays focused on what shoppers actually care about.
- Reuse Size Charts across categories. Build one chart per garment family and apply it via Applicable Category — you maintain one chart, not one per SKU.
Troubleshooting
My new field does not show on the product form
Two common causes. First, you may have toggled Applicable Category on and the product’s category is not selected — open the field, fix the categories, and save. Second, refresh the product form — newly added fields appear after a reload.
Checkout Field type is greyed out
Checkout Fields need the Business plan. Upgrade your plan, or model the same input as an Attribute Field (without the live shopper input).
Storefront filter chips are missing
Open the field in the Product Fields panel and check the Do not show in Products Filter Menu toggle. Turn it off so the field becomes a filter on the storefront listing pages.
My color swatches do not show colors
Name the variant field exactly Color (or color). The hex/name picker is keyed off the field name, so rename the field if it was created with a different label.
Old products do not show the new field’s value
A field added later does not back-fill values. Open each product and set the field value, or use Bulk Product Upload (CSV) to set it across the catalogue in one pass — see Bulk product upload via CSV.
Shoppers see too many Checkout Fields and the page feels crowded
Shoopy caps the live display at 5 Checkout Fields per product. Mark the less important ones as inactive or move them to Attribute Fields if shopper input is not strictly required.