 Shoopy
 Setting up your Shoopy store
A 7-step checklist to take your store from empty to ready-to-sell — store details, products, themes, payments, delivery, policies, and a test order.
Once your account is created, the work is mostly configuration — nothing code, nothing technical. This page is the short roadmap to set up your Shoopy store so it’s ready to take a real order. Work through the seven steps below in order, or skip around if you already know what’s missing. For what the finished storefront can do, see your online store.
Before you begin
- A Shoopy account is created — see Create your Shoopy account if you haven’t done that yet
- 10–15 minutes for the basics, more if you want a fully polished storefront
- Your business details handy: logo file, address, GST number (if applicable), bank details for payouts
The 7-step checklist
| # | Step | Where it lives in the admin |
|---|---|---|
| 1 | Store details — logo, address, legal info | Settings → Store Details |
| 2 | Add your products | Categories → then Products |
| 3 | Design your online store | Themes |
| 4 | Set up payments | Settings → Payment Settings |
| 5 | Set up delivery | Settings → Delivery Settings |
| 6 | Add your policies | Settings → Policies |
| 7 | Place a test order | Your storefront URL |
Step 1 — Store details
Start here. Settings → Store Details is where your storefront gets its identity — logo, favicon, business contact info, and legal details for invoicing.
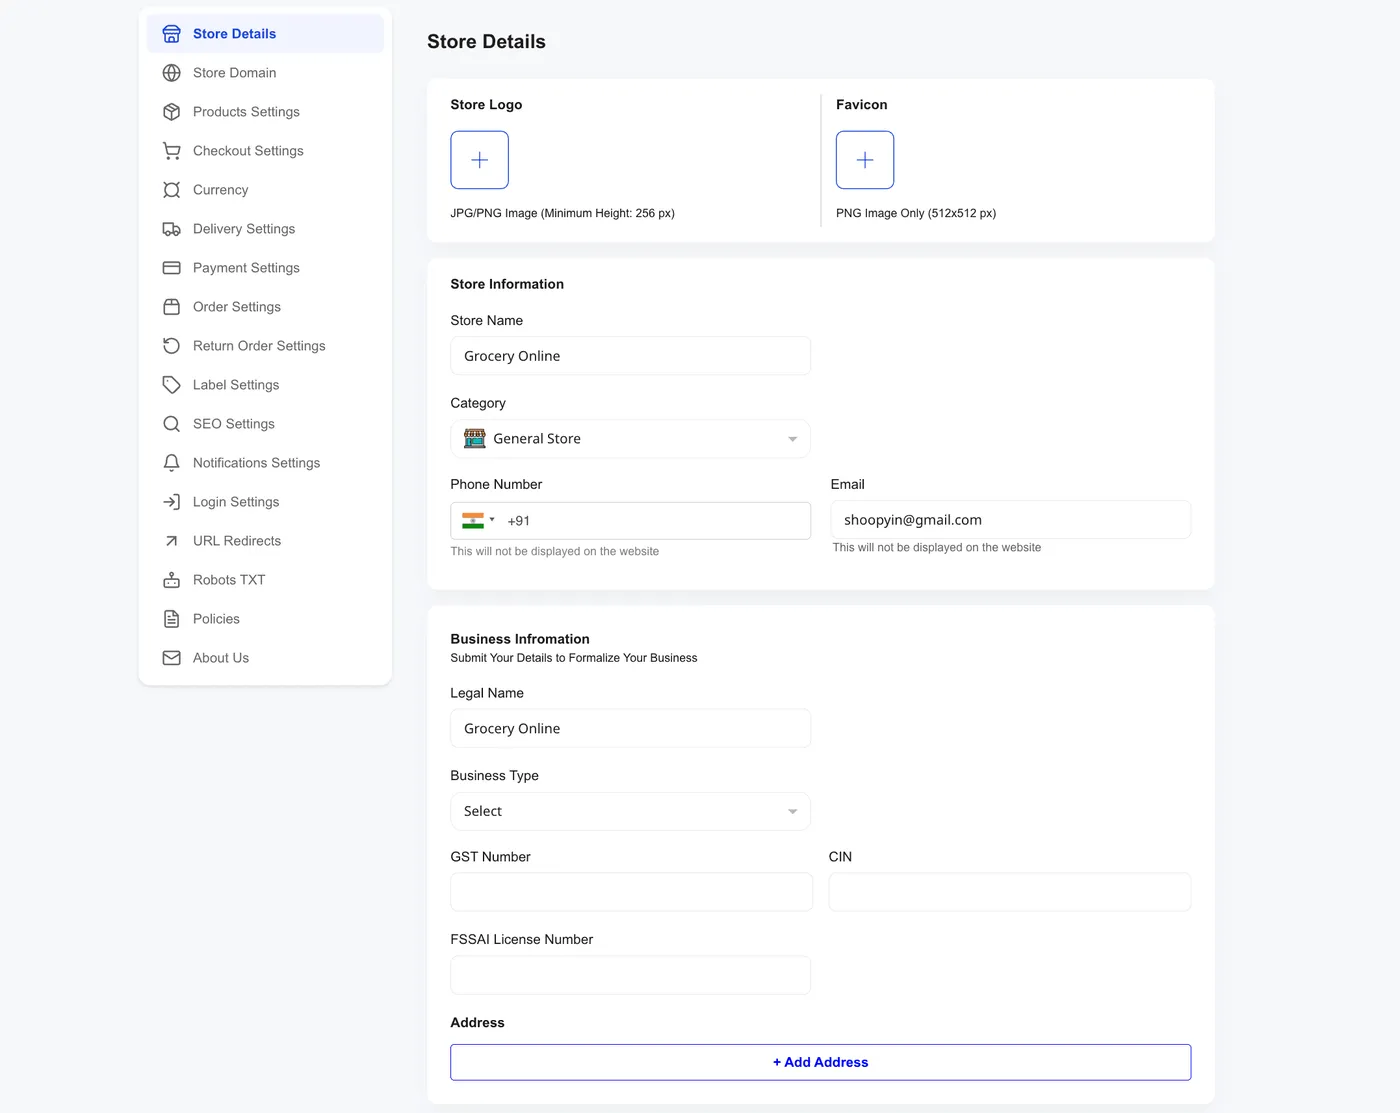
At minimum, set:
- Store Logo — JPG or PNG, minimum 256 px height
- Favicon — PNG only, 512×512 px
- Store Name, Category, Phone, Email — these drive the storefront header and customer-facing contact
- Address — one or more; shown on invoices and (optionally) on the website
If you’re invoicing for GST, fill the Business Information block — legal name, business type, GST number, CIN, and FSSAI license if relevant.
Step 2 — Add your products
Before adding products, create a couple of Categories — they organise the storefront and are reused across products, coupons, and reports.
Then head to Products → Add Product:
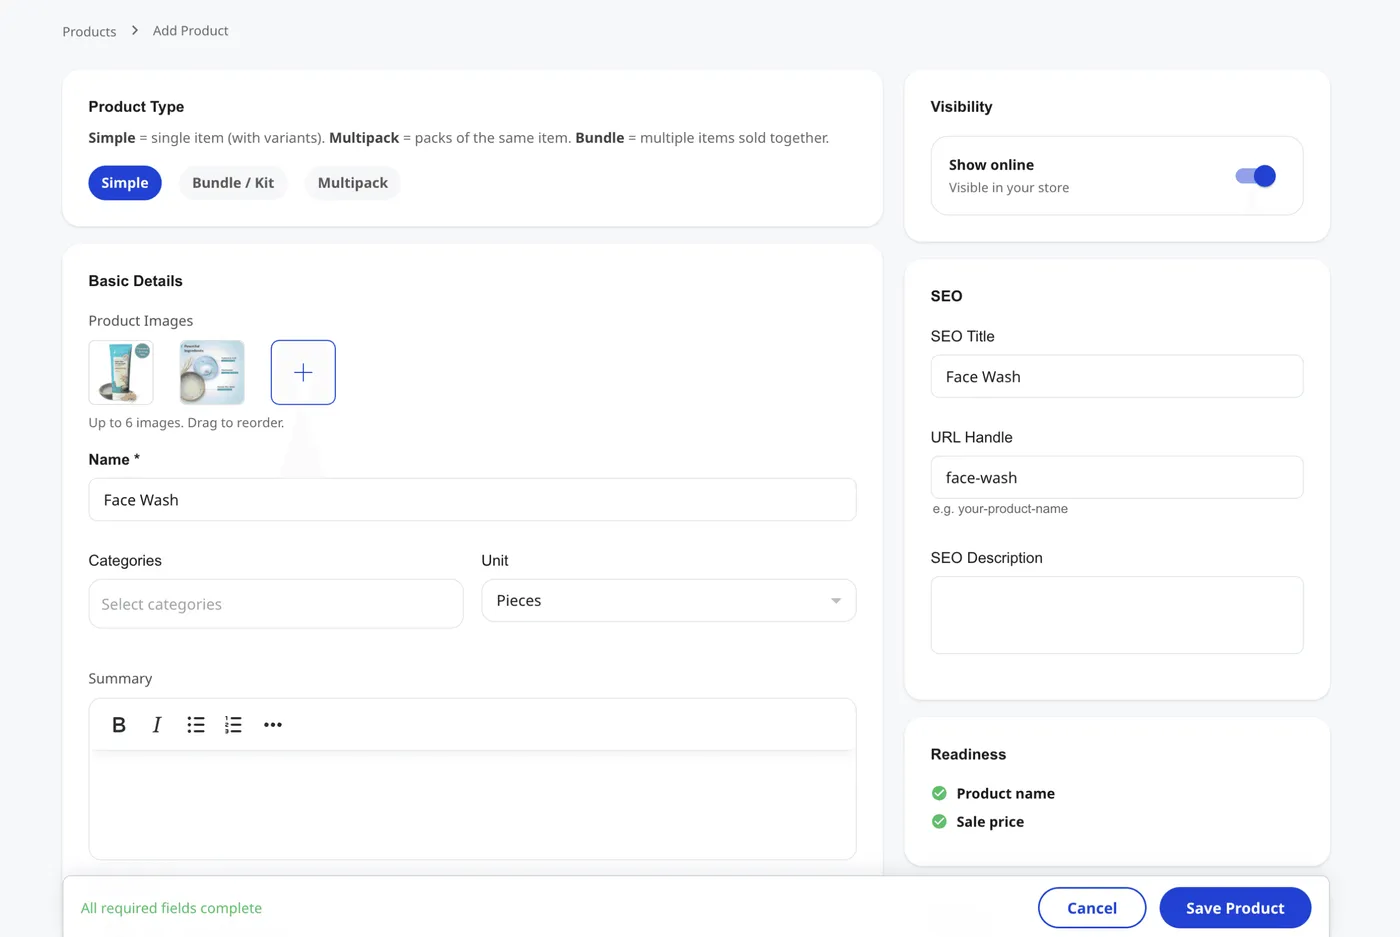
Key fields for a first product:
- Product Type — Simple (single item), Bundle/Kit (items sold together), or Multipack (packs of the same item)
- Product Images — up to 6, drag to reorder; the first is the main thumbnail
- Name, Categories, Unit (Pieces, Kg, etc.)
- A summary, and a Sale Price (on the next section below the fold)
Shoopy shows a Readiness panel on the right — a product becomes listable once Name and Sale Price are green. Deep dive: Adding a product in Shoopy.
Step 3 — Design your online store
Open Themes to pick how your storefront looks. Shoopy ships with themes tuned for common store types — general stores, fashion, grocery, home decor, bags, watches, and more.
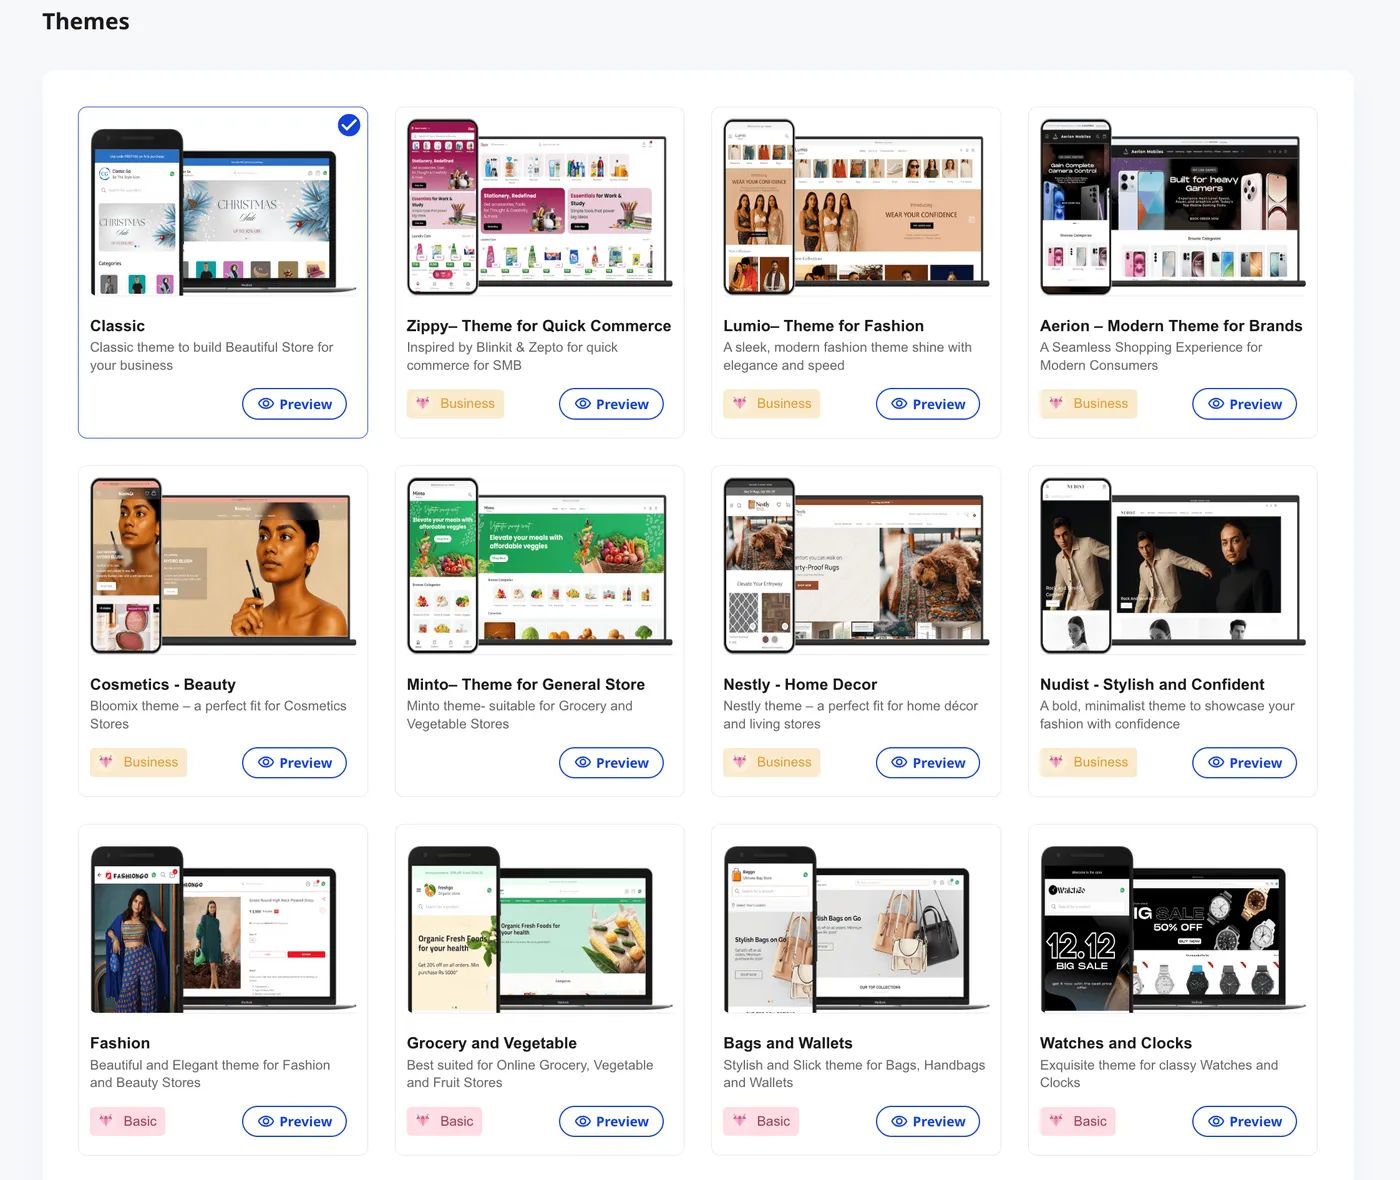
Each theme card shows:
- A preview of the storefront
- A plan badge — some themes are Basic (available on every plan), others are Business (unlock on upgraded plans)
- Preview to see it live before committing
After picking a theme, you can customise fonts, colours, and section layouts from the theme editor.
Step 4 — Set up payments
Go to Settings → Payment Settings. Cash on Delivery is on by default, which is enough to take your first orders.
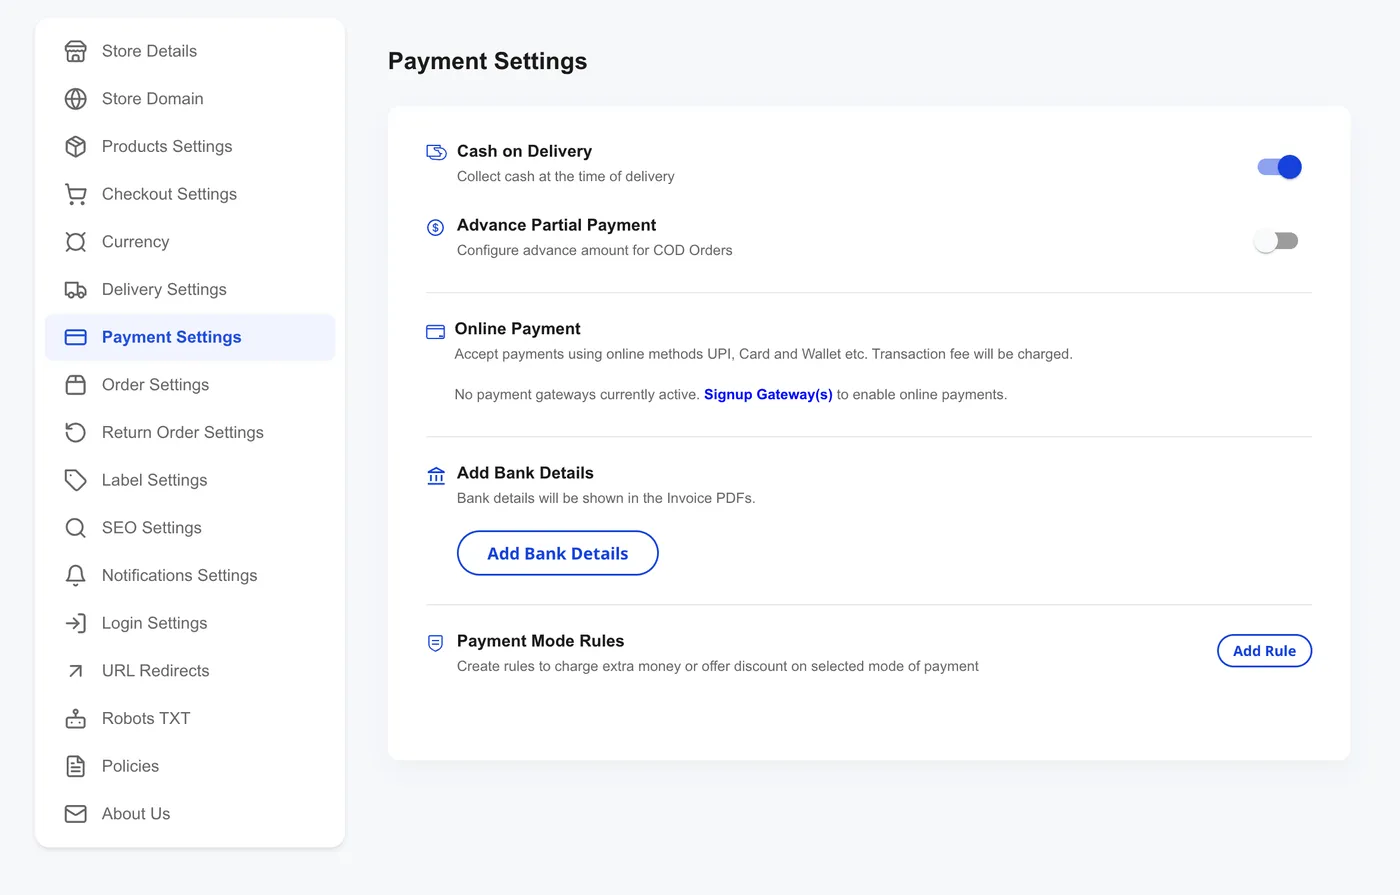
To accept online payments, click Signup Gateway(s) in the Online Payment card. Shoopy shows the supported gateways:
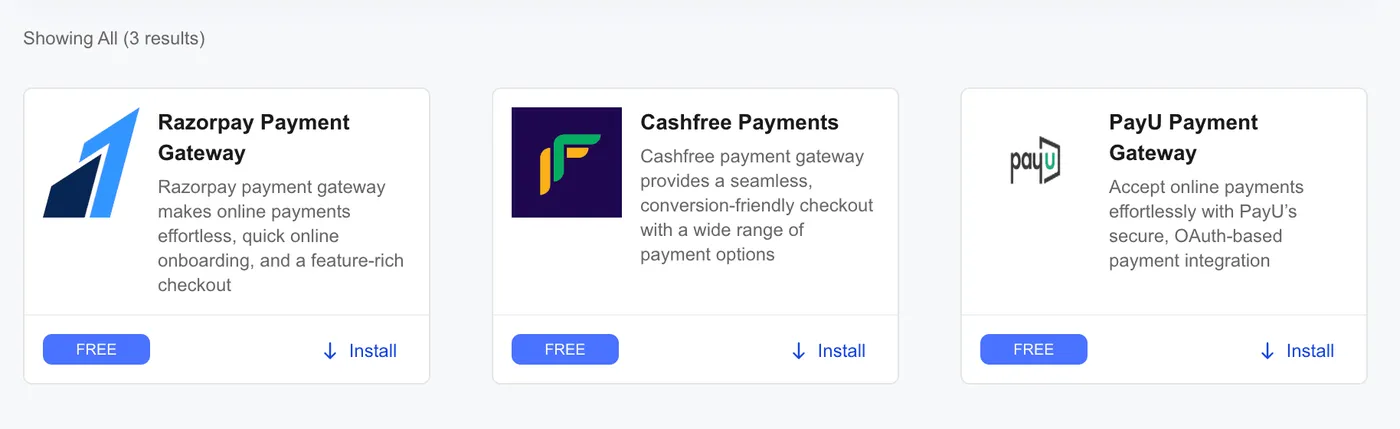
All three — Razorpay, Cashfree, and PayU — are free to install. Pick whichever your bank account is most aligned with; you can always add more later. After installing, follow the gateway’s own KYC to go live.
While you’re on the Payment Settings page, also:
- Fill Add Bank Details — these are printed on the invoice PDFs
- Turn on Advance Partial Payment if you want to collect a deposit on COD orders
- Set up Payment Mode Rules if you want to charge extra or give a discount on specific payment methods
Step 5 — Set up delivery
Settings → Delivery Settings controls how orders reach customers.
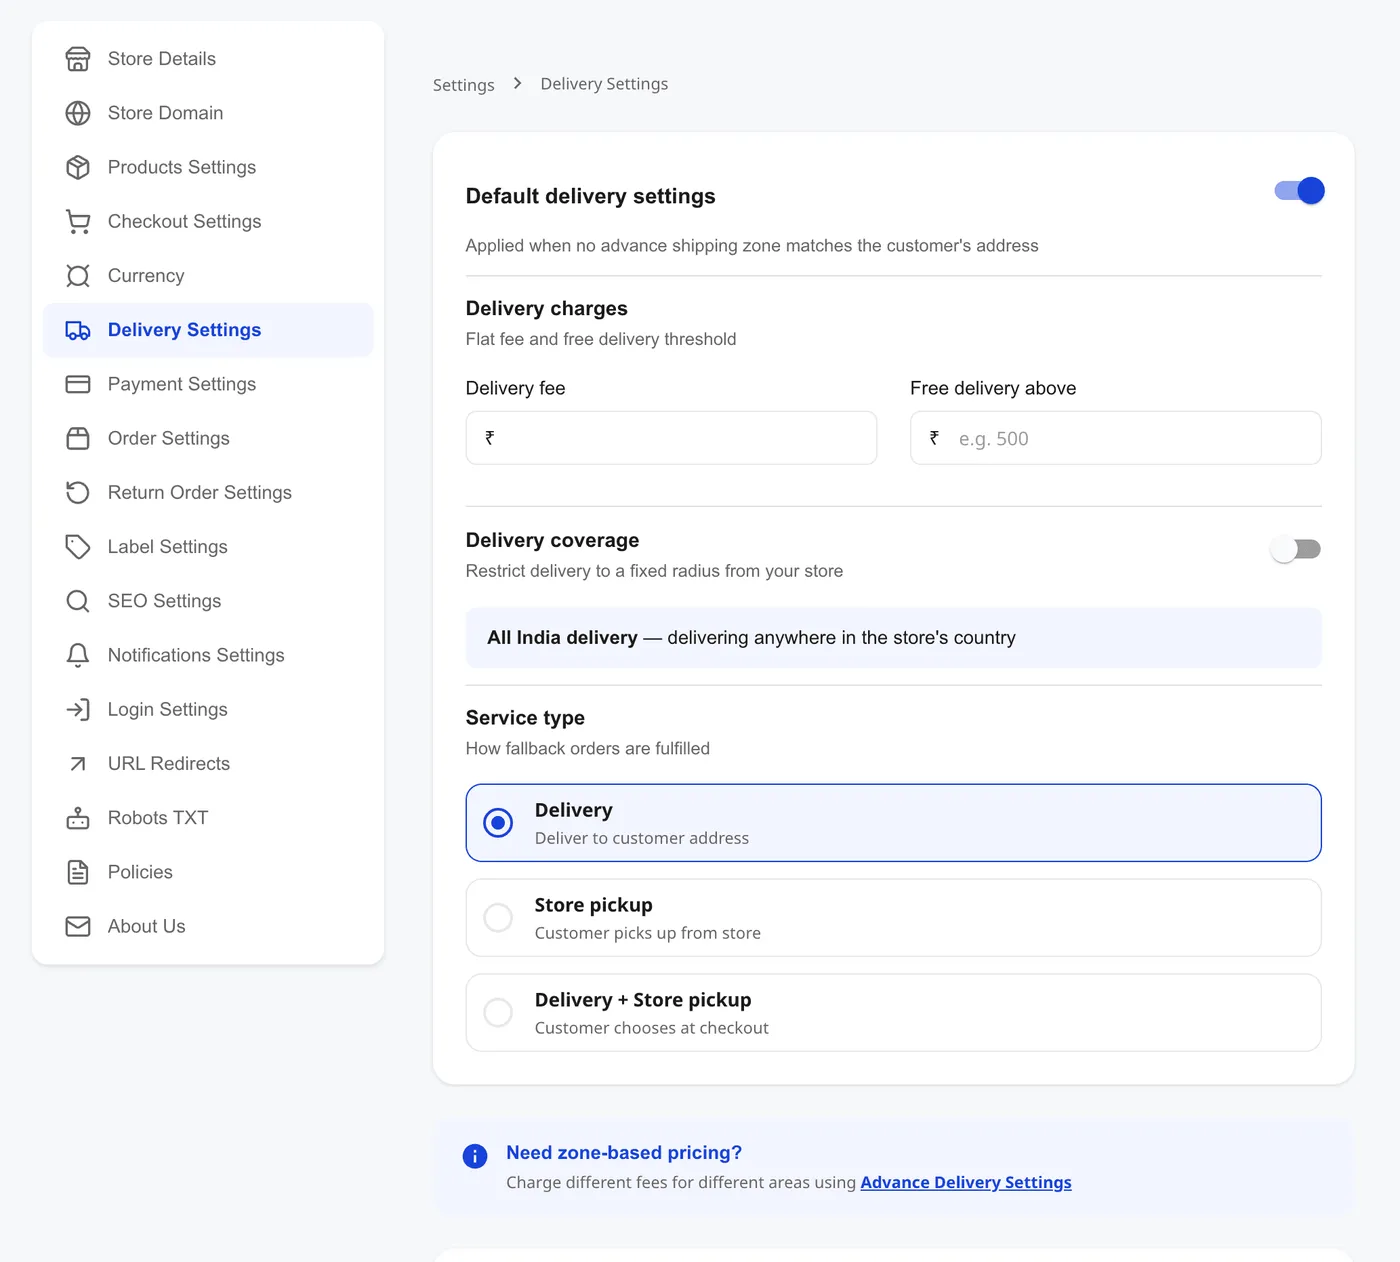
The defaults work for most new stores — all-India delivery, a flat delivery fee, and an optional free-delivery threshold. If you only deliver locally, turn on Delivery coverage and set a radius from your store.
Pick a Service type:
- Delivery — you deliver to the customer’s address
- Store pickup — customer picks up from your store
- Delivery + Store pickup — customer chooses at checkout
For zone-based pricing (different fees per region), open Advance Delivery Settings.
Step 6 — Add your policies
Settings → Policies is a single place for the five policies customers will see on your storefront and at checkout.
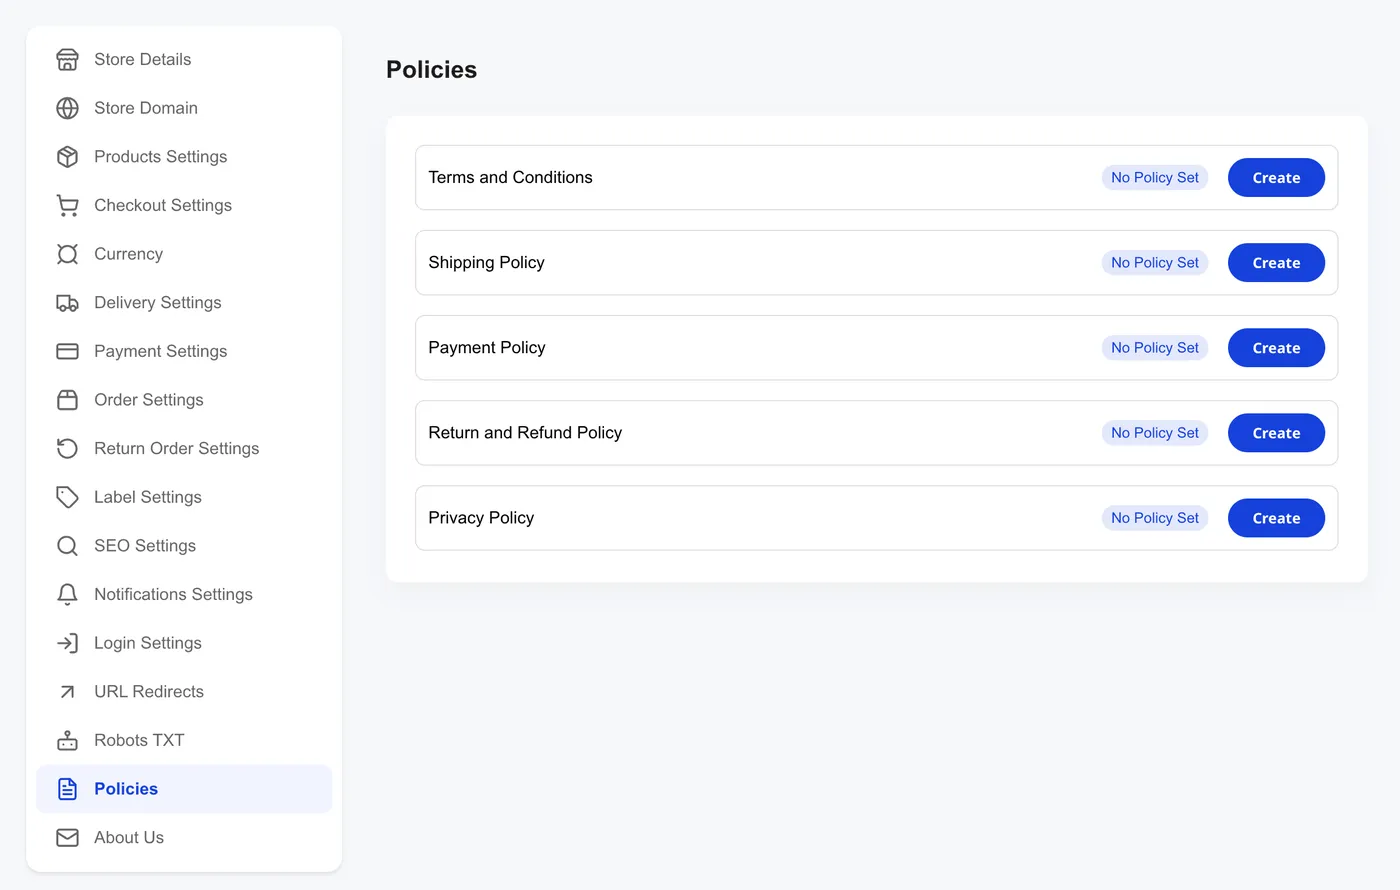
You’ll see five slots, all starting as No Policy Set:
- Terms and Conditions
- Shipping Policy
- Payment Policy
- Return and Refund Policy
- Privacy Policy
Click Create on each to open an editor — a short paragraph per policy is fine for launch; you can refine later. Policies appear linked from the storefront footer and at checkout, and go a long way toward making a new store feel trustworthy.
Step 7 — Place a test order
Once products, payments, delivery, and at least one policy are in place, go place an order on your own storefront — end to end. Open your storefront URL, add a product, and walk through checkout.
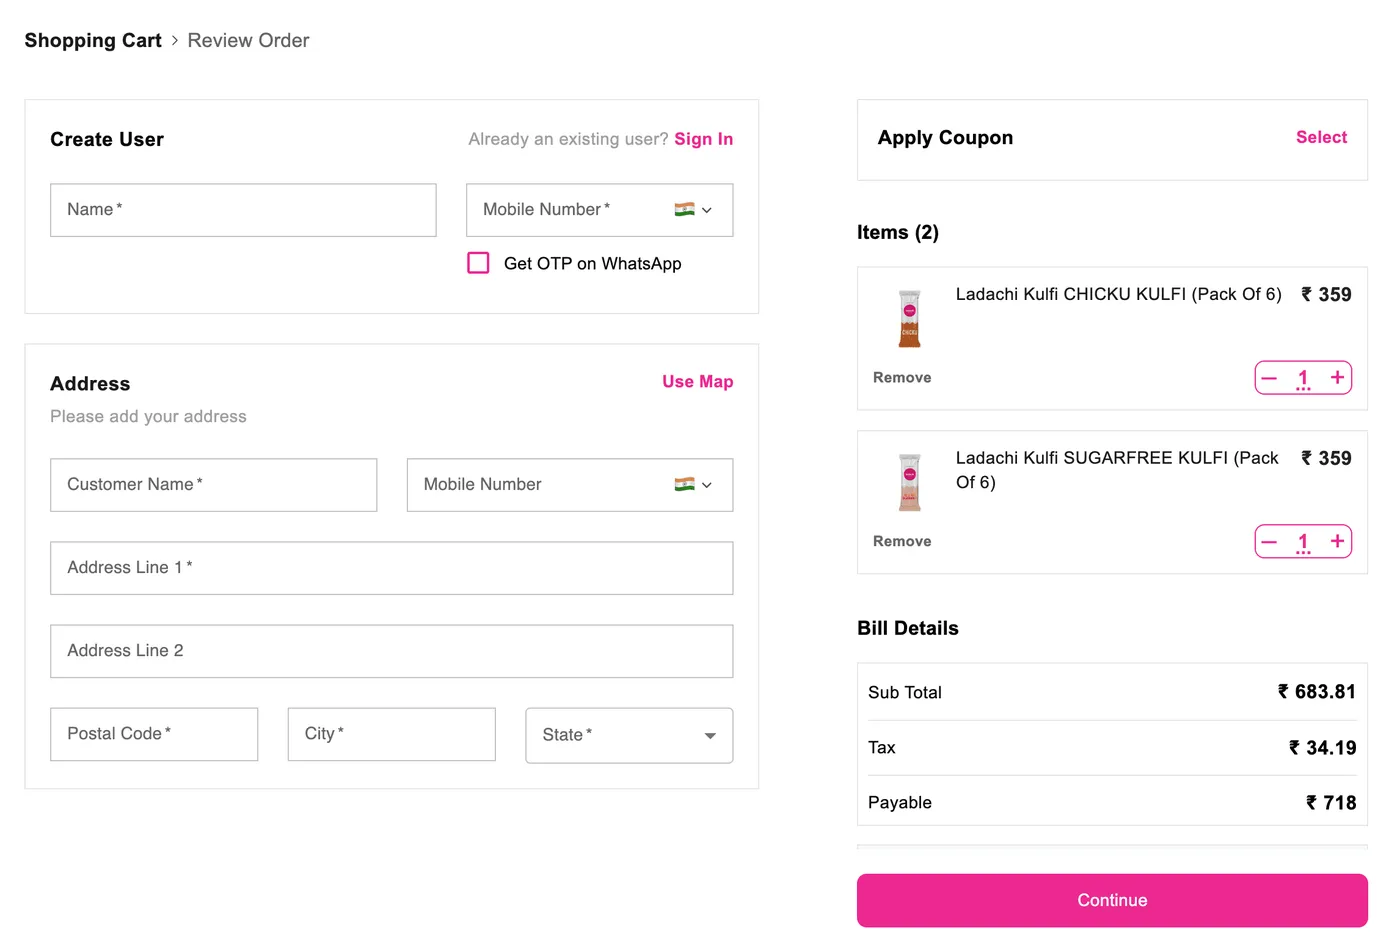
The checkout collects name, phone, address, and bill details, then lets you pay by any enabled method. Place it on Cash on Delivery so no real money moves, then:
- Open the admin — Orders — and confirm the order appears
- Walk it through the order lifecycle (CONFIRMED → SHIPMENT_READY → SHIPPED → COMPLETE)
- Or cancel it to clean up
Tips
- Do Steps 1 and 6 first. A store with a logo, address, and policies feels trustworthy even if the catalogue is small.
- Run Steps 2 and 3 in parallel. Adding products and picking a theme don’t depend on each other.
- Don’t connect online payment gateways until your bank details are ready. Every gateway wants bank account details and KYC upfront.
- Use the test order to catch issues early — broken images, missing policy links at checkout, wrong delivery fee, unclear product descriptions.
Troubleshooting
My storefront is live but shows no products
You probably haven’t created a category yet, or your product is set to Hide in the Visibility toggle. Open the product and flip Visibility to Show online.
A theme card has a “Business” badge I can’t select
That theme is gated behind an upgraded plan. Switch to a Basic theme or upgrade — see Choosing your Shoopy plan.
Policies aren’t showing at checkout
Each policy is a separate slot — make sure you opened the editor and clicked Save, not just the Create button. A saved policy shows a green status instead of “No Policy Set”.
The gateway “Install” button just takes me to the gateway’s own signup
That’s expected. Shoopy connects your store to Razorpay / Cashfree / PayU, but you still need to complete their own onboarding and KYC directly on their site. Once they approve you, the gateway becomes active in Shoopy automatically.